 erkemoz
Erkemoz - Duplicate Finder User Guide
Step by step: finding duplicate files, choosing which copy to keep, and cleaning up safely.
Installing and first start
- Download the installer with the download button on this page and run it.
- If Windows shows "Windows protected your PC" (SmartScreen), click "More info" → "Run anyway". This warning appears because the program isn't signed with a paid certificate yet.
- When setup finishes, open the program from the Start menu.
- Change the interface language from the “Language” menu in the top bar; there are 8 languages.
- The program checks for new versions by itself; when one is out, it asks and installs it in one click.
Scanning
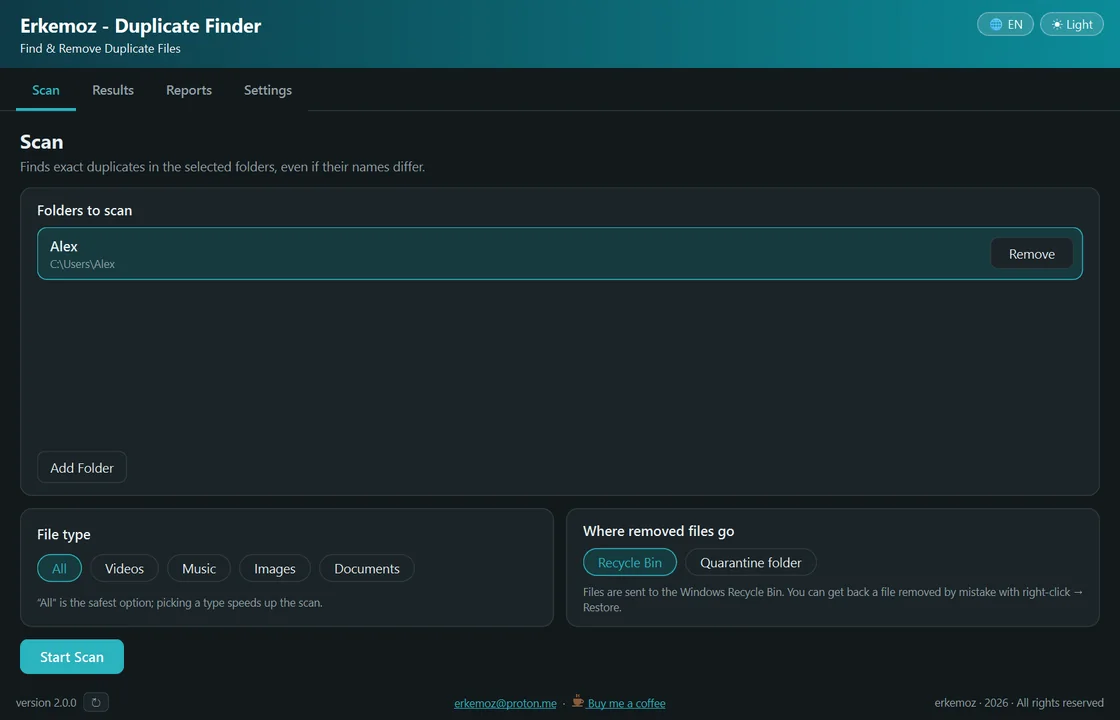
- On the “Scan” tab, click “Add Folder” and choose a folder to scan. You can add several folders.
- Under “File type”, choose what to look for: “All”, “Videos”, “Music”, “Images” or “Documents”. “All” is the safest choice; picking a type makes the scan faster.
- Under “Where removed files go”, choose “Recycle Bin” or “Quarantine folder”.
- Click “Start Scan”. The program checks size first, then the start and end of each file, and finally the whole content; it finds identical files even if their names or dates differ.
Choosing which copy stays
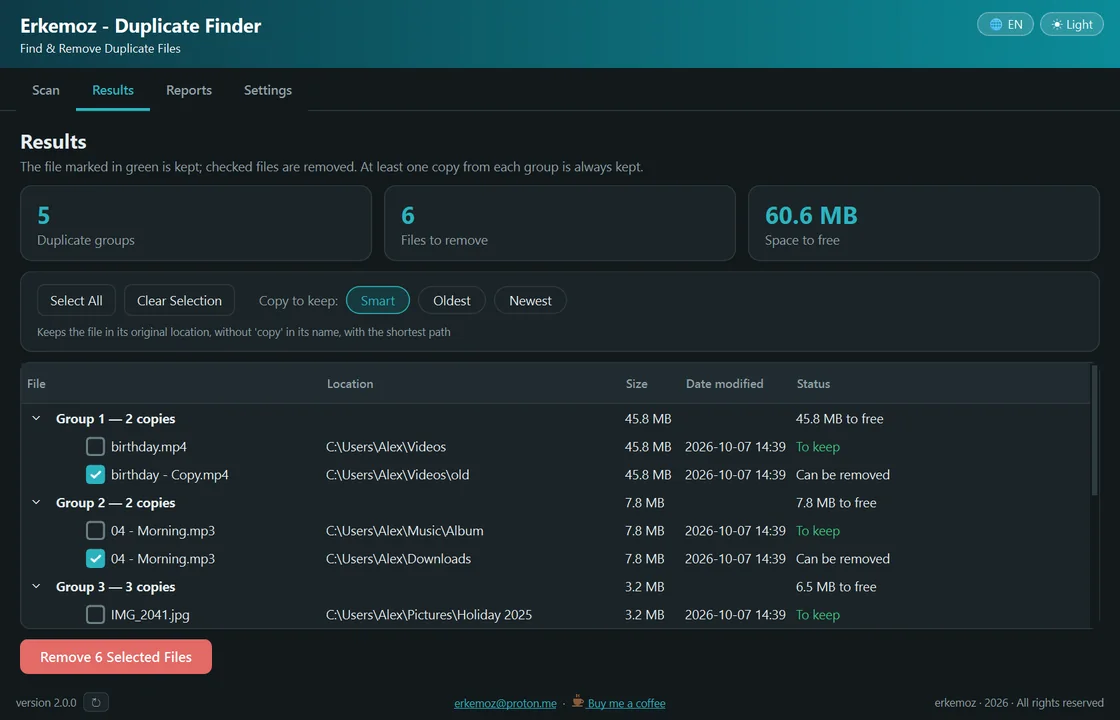
- On the “Results” tab, files are listed in groups; the top shows how many groups there are and how much space you'll free.
- Set the rule with “Copy to keep”: “Smart” (the file in the original location, without “copy” in its name and with the shortest path), “Oldest” or “Newest”.
- The file marked green is kept; files with a ticked box are cleaned. Tick the kept copy's box and protection moves to another copy in the group. At least one copy of every group always stays.
- Right-click a file to choose “Keep this file (remove the others)” or “Open file location”.
Cleaning up and undoing
- Click “Remove N Selected Files”; the confirmation shows how many files go where. Then click “Yes, Remove”.
- If you chose the Recycle Bin, bring a file back by right-clicking it in the Recycle Bin → Restore.
- If you chose quarantine, files are moved to the quarantine folder with their folder structure kept; open it with “Open Quarantine”.
- An Excel report is written for every scan and every cleanup; double-click a row on the “Reports” tab to open it.
Frequently asked questions
Does it find files with different names?
Yes. Files are compared by content; name, date and folder don't matter.
I cleaned a file by mistake. Can I get it back?
The program never deletes permanently. The file is either in the Recycle Bin (right-click → Restore) or in the quarantine folder.
Why aren't identical files inside program folders listed?
Copies of the same file inside a program are needed; deleting them breaks the program. That's why such folders are in “Folder names to always skip”; you can edit the list in “Settings”.
Are OneDrive files downloaded?
No. Files that are in the cloud but not downloaded to the computer, shortcuts and system files are always skipped.
What if I change a file after the scan?
A file that changed after the scan is not cleaned, for safety; it is skipped and noted in the report.

Find the tools useful?
They're free and will stay free. If one saved you some time, you can buy me a coffee — it helps keep new programs coming.